Welcome to the world of DASM! For students who want to learn!
|
LINKS |
Creating a custom Loading screen. |
||
|
|
Your own loading screen
|
|
|
|

|
|
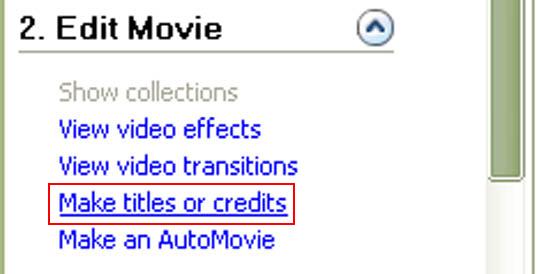
STEP TWO
|


|
|
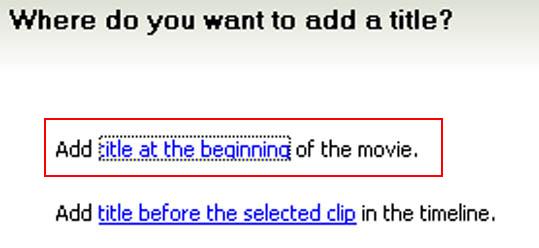
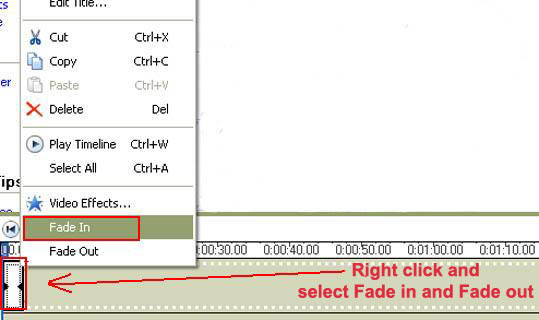
STEP THREE
|

|
Select Fade in and Fade out
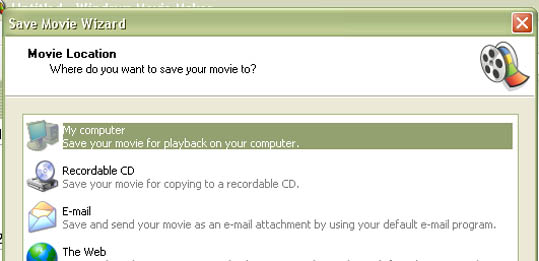
Select My computer
|
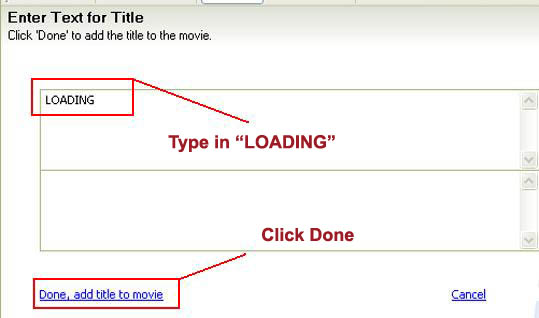
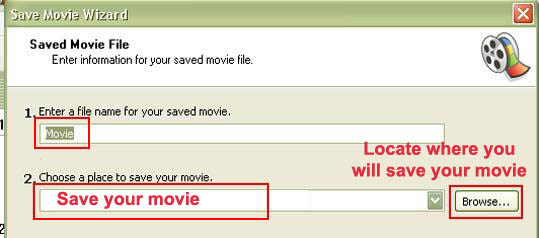
STEP FOUR
|
|
|
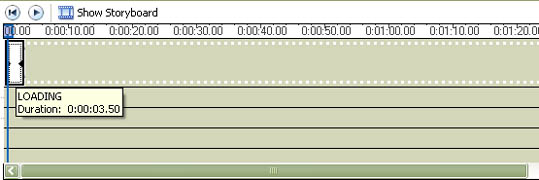
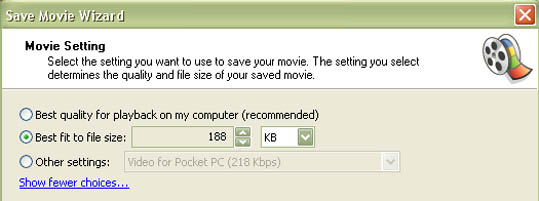
STEP FIVE
|


|
|
STEP SIX
|

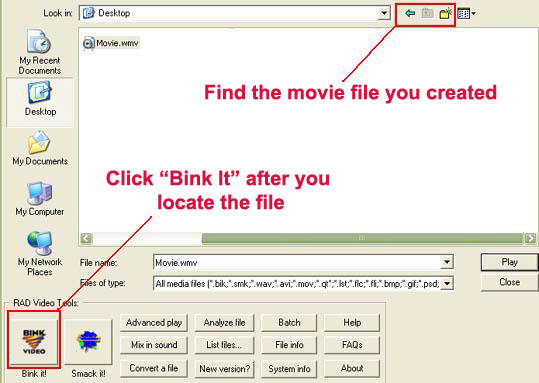

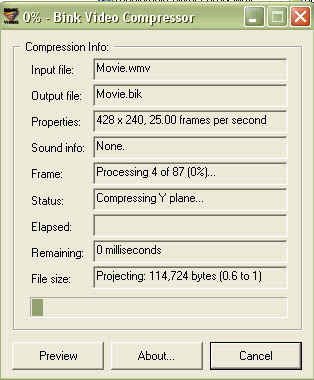
|
|
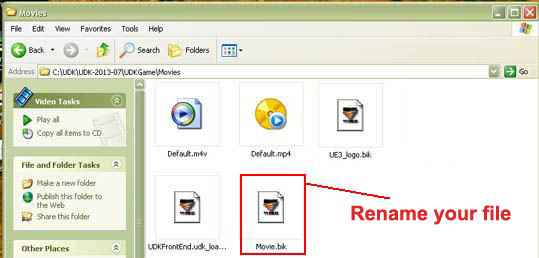
STEP SIX
|

[Top]
______________________________________________________________________
All software packages created was used by the power of the Unreal Development Kit.
In game loading screens created by using BINK VIDEO. ______________________________________________________________________


Comments on this site to: feedback@worldofdasm.com
Date Modified: 04/01/2016
© World of DASM, and the DASM series, created by Shane Hillier
.
© 2013-2016 all rights reserved